
Aprilaire 500 Installation: A Comprehensive Guide (Updated 03/24/2026)
Welcome! This detailed manual guides you through a successful Aprilaire 500 installation, ensuring optimal performance and user expertise with clear, step-by-step instructions.

The Aprilaire 500 is a whole-house bypass humidifier designed to add essential moisture to your home’s air during dry heating seasons. Maintaining optimal humidity levels – typically between 30-40% – offers numerous benefits, including improved comfort, reduced static electricity, and protection for wood floors, furniture, and musical instruments.
This model utilizes your home’s existing forced-air heating system to distribute moisture evenly throughout your living space. Unlike portable humidifiers, the Aprilaire 500 operates quietly and efficiently, requiring minimal maintenance. This comprehensive guide provides detailed instructions for a successful installation, ensuring years of reliable performance and enhanced indoor air quality. Proper installation is crucial for maximizing the unit’s effectiveness and longevity.

Safety Precautions & Warnings
Important Safety Information: Before beginning the Aprilaire 500 installation, always disconnect power to your HVAC system at the breaker box to prevent electrical shock. Wear appropriate safety glasses and gloves during all stages of the installation process.
Exercise caution when working with ductwork, as edges may be sharp. Ensure the unit is properly grounded according to local electrical codes. Do not attempt to modify the unit in any way, as this could compromise its safety and performance. If you are uncomfortable with any aspect of the installation, consult a qualified HVAC professional. Ignoring these warnings could result in personal injury or property damage.
Unboxing & Component Checklist
Careful Unboxing is Key: Upon receiving your Aprilaire 500, carefully inspect the shipping container for any signs of damage. Gently open the box and remove all components. The package should include: the Aprilaire 500 humidifier unit, a mounting bracket, a humidifier pad, a water supply connector kit, a drain line connector, and the control panel.
Refer to the included parts list to verify that all items are present. Retain the packaging materials for potential returns or warranty claims. Document any discrepancies immediately and contact Aprilaire support. A complete component inventory ensures a smooth installation process.

Identifying Key Components
Familiarize Yourself: The Aprilaire 500 unit itself houses the core humidification system. The mounting bracket securely attaches the unit to your ductwork. The humidifier pad, a crucial element, absorbs water for evaporation. The water supply connector kit facilitates connection to a cold water source.
The drain line connector manages water drainage, preventing buildup. Lastly, the control panel allows for operational adjustments and monitoring. Understanding each component’s function is vital before proceeding. Refer to the detailed diagrams in the appendix for visual identification. Proper component recognition streamlines the installation process and ensures correct assembly.
Checking for Damage During Shipping
Inspect Thoroughly: Upon receiving your Aprilaire 500, carefully inspect all components for any shipping damage. Examine the unit’s casing for dents or cracks. Check the humidifier pad for tears or compression. Verify the control panel displays no visible damage.
Inspect all connectors and hoses for breaks or kinks. Document any damage with photographs immediately. Report any issues to the carrier and Aprilaire Support within 24 hours. Do not attempt installation with damaged parts. Utilizing damaged components can compromise performance and void the warranty. Prioritizing this step ensures a safe and effective installation.
Tools Required for Installation
Essential Tools: A successful Aprilaire 500 installation requires specific tools. You’ll need a Phillips head screwdriver for securing the unit and control board. A flathead screwdriver is useful for various adjustments. A drill with appropriate bits is necessary for mounting. Wire strippers/crimpers are vital for electrical connections.
Additional necessities include a voltage tester to confirm power is off, duct tape for sealing connections, a pipe wrench for water line connections, and a level to ensure proper installation. Measuring tape and a utility knife are also recommended. Having these tools prepared beforehand streamlines the process.
Pre-Installation Considerations
Location is key: Before starting, carefully determine the optimal location for your Aprilaire 500. Choose a space near both your HVAC system and a cold water supply. Ensure sufficient clearance for maintenance and pad replacement.
System compatibility: Thoroughly assess your existing HVAC system. Verify adequate airflow and ductwork size to support the humidifier. Confirm your furnace’s voltage matches the Aprilaire 500’s requirements. Consider potential interference with other components. Proper pre-planning prevents issues during and after installation.
Determining Optimal Location
Proximity matters: The ideal location is near your furnace and a cold water pipe, minimizing lengthy connections. Accessibility is crucial for future maintenance, including pad changes and cleaning. Avoid areas prone to freezing temperatures or excessive moisture.
Airflow considerations: Ensure unobstructed airflow around the unit. Sufficient space prevents restricted operation. Consider ductwork layout for easy connection to both supply and return ducts. A central location often provides the most even humidity distribution throughout your home. Prioritize a dry, protected space.
Assessing Existing HVAC System Compatibility
Verify furnace compatibility: The Aprilaire 500 works best with forced-air heating systems. Confirm your furnace’s ability to handle the added airflow restriction. Check ductwork size; undersized ducts can limit performance. Ensure adequate static pressure capacity within your HVAC system.
Electrical system evaluation: Confirm your electrical system meets the unit’s voltage and amperage requirements. Inspect the control board for compatibility with your existing thermostat. Consider professional assessment if unsure about electrical connections. Proper compatibility guarantees efficient and safe operation, preventing damage to your HVAC system.

Wiring Diagram Overview
Understanding the connections: The Aprilaire 500 utilizes a straightforward wiring scheme. Key components include the control board, power supply, and humidifier solenoid valve. Refer to the detailed diagrams in the appendix for precise wire placement.
Color-coded wires simplify the process, but double-checking is crucial. Identify the 24V common (C) wire, essential for power. Pay close attention to the thermostat wiring, ensuring proper integration. Incorrect wiring can cause malfunctions or damage. Always disconnect power before working with electrical components for safety.
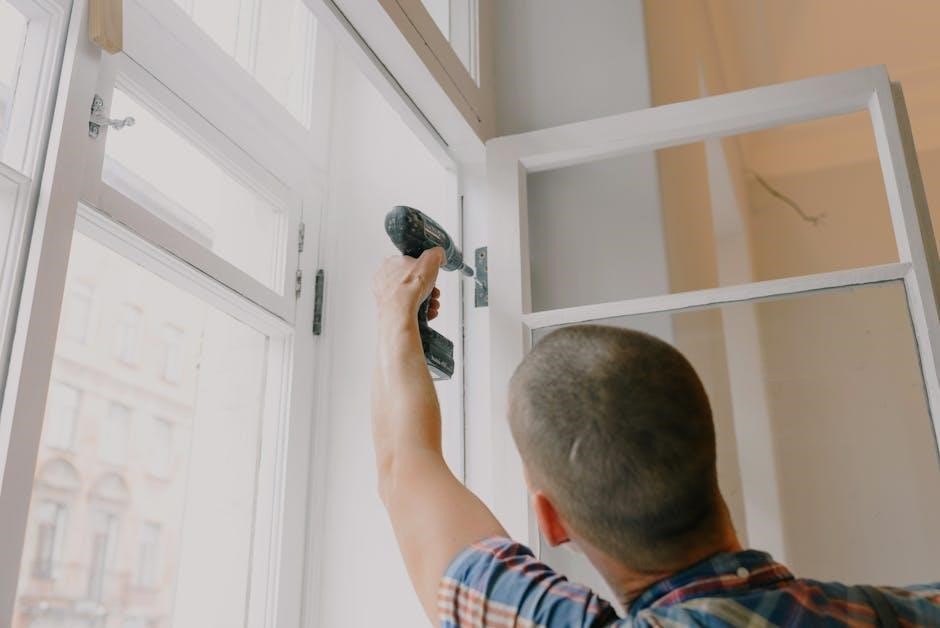
Electrical Connection – Step-by-Step
Safety first: Disconnect power at the breaker before starting. Locate the control board within the Aprilaire 500 unit. Connect the 24VAC power supply to the designated terminals, observing polarity. Securely attach the wires using wire nuts, ensuring a tight connection.
Next, connect the thermostat wiring according to the wiring diagram. Verify all connections are snug and properly seated. Double-check for any exposed wires. Restore power at the breaker and test the unit. If no power, re-examine all connections and the power supply voltage.

Power Supply Requirements (Voltage & Amperage)
The Aprilaire 500 requires a dedicated 24VAC power supply. Ensure the transformer provides a stable voltage within the range of 20-28VAC. The amperage requirement is typically 0.8 amps, but verify your specific model’s label. Using an incorrect voltage can damage the unit.
A Class 2 transformer is essential for safety; Avoid using a line voltage transformer. Proper grounding of the transformer is crucial. Confirm the power supply is adequately sized for the humidifier and any connected accessories. Consult a qualified electrician if unsure about power supply compatibility.
Connecting the Control Board
Carefully locate the control board within the Aprilaire 500 unit. Connect the 24VAC power supply wires to the designated terminals, observing correct polarity. Attach the wiring harness from the humidifier to the corresponding terminals on the control board. Ensure all connections are secure and firmly seated.
Refer to the wiring diagram for precise terminal identification. Double-check all connections before applying power. Improper wiring can cause malfunction or damage. Secure the control board to prevent vibration. Test the connections with a multimeter to verify proper voltage and continuity.
Ductwork Preparation & Connection
Proper ductwork is crucial for optimal Aprilaire 500 performance. Inspect existing ducts for leaks and damage, sealing any imperfections with duct mastic or foil tape. Ensure adequate space around the unit for connections; Cut openings in the supply and return ducts, matching the Aprilaire 500’s collar dimensions.
Securely attach the unit to the ducts using screws or clamps, ensuring an airtight seal. Avoid sharp bends or restrictions in the ductwork. Consider using insulated ductwork to prevent condensation. Verify proper airflow direction before proceeding. A well-prepared and connected duct system maximizes humidification efficiency.
Sizing and Sealing Ductwork
Accurate duct sizing is paramount for efficient airflow and optimal humidity control. Consult HVAC guidelines to determine appropriate duct diameters based on your system’s capacity and airflow requirements. Undersized ducts restrict airflow, while oversized ducts reduce efficiency.
Thoroughly seal all duct connections using high-quality duct mastic or foil tape – never duct tape! Inspect for leaks at seams, joints, and around fittings. Address any identified leaks promptly to prevent energy loss and maintain consistent humidity levels. Proper sealing ensures maximum performance and minimizes wasted energy.
Connecting to Supply & Return Air Ducts
Carefully connect the Aprilaire 500 to both the supply and return air ducts. Ensure proper airflow direction, with the unit installed on the supply side of the blower. Use insulated duct connectors to minimize condensation and maintain temperature stability.
Securely fasten the ductwork to the humidifier using screws or clamps, ensuring a tight and airtight seal. Avoid obstructing airflow with any internal components. Double-check all connections for leaks after installation. Proper connection is vital for efficient operation and prevents potential issues with humidity distribution.
Humidifier Pad Installation
Begin by removing the humidifier pad retaining clips. Carefully slide the new Aprilaire humidifier pad into the designated slot, ensuring it’s fully seated and aligned. Avoid bending or damaging the pad during installation, as this can restrict airflow.
Confirm the pad is snug but not overly compressed. Reattach the retaining clips securely, guaranteeing the pad remains in place during operation. A properly installed pad is crucial for optimal moisture evaporation and efficient humidification. Inspect the pad regularly for mineral buildup and replace as needed for peak performance.
Water Supply Line Connection
Locate a cold water source near the Aprilaire 500 unit, ideally with a shut-off valve for easy maintenance. Use a ½-inch copper or PEX tubing to connect to the humidifier’s water inlet. Apply Teflon tape to the threads of all connections to prevent leaks.
Ensure a secure and watertight connection, avoiding over-tightening which can damage the fittings. Consider installing a saddle valve if direct plumbing isn’t feasible, but monitor for potential leaks. Proper water supply connection is vital for consistent humidification and preventing water damage.
Connecting to a Cold Water Source

Identify a suitable cold water pipe, preferably copper, within a reasonable distance of the Aprilaire 500. A dedicated supply line is recommended, avoiding shared lines with other appliances. Install a shut-off valve on the cold water pipe for easy isolation during maintenance or emergencies.
Use a ½-inch copper or PEX tubing to run from the valve to the humidifier’s water inlet. Ensure the water pressure is within the specified range (typically 20-100 PSI). Proper connection prevents contamination and ensures reliable operation of the humidification system.
Preventing Water Hammer & Leaks
Water hammer, a disruptive banging sound, occurs when water flow is abruptly stopped. Install a water hammer arrestor on the cold water supply line near the Aprilaire 500 to absorb shock and minimize noise. Regularly inspect all water connections – at the valve, tubing, and humidifier inlet – for any signs of leaks.
Use Teflon tape on threaded connections to create a watertight seal. Ensure tubing is securely clamped to prevent movement and stress on joints. Promptly address any detected leaks to avoid water damage and maintain optimal humidifier performance.
Drain Line Installation
Proper drain line installation is crucial to prevent water damage and ensure efficient operation. Connect a 3/4-inch inner diameter (ID) drain line to the humidifier’s drain outlet. Route the drain line to a suitable floor drain, standpipe, or condensate pump location, ensuring a continuous downward slope.

Avoid sharp bends or kinks in the drain line, as these can restrict flow. Secure the drain line with clamps or supports to prevent sagging. Do not connect the drain line directly to a sewer line, as this can cause back-siphoning. Regularly inspect the drain line for clogs or leaks;
Control Panel Setup & Configuration
After electrical connection, the control panel requires careful setup. Power on the unit and navigate the menu using the control buttons. Set the desired humidity level based on your comfort and home’s needs – typically between 30-40% in winter. Configure the fan settings to synchronize with your HVAC system’s operation.
Explore advanced features like automatic humidity control and outdoor temperature reset. Calibrate the humidity sensor if necessary, following the on-screen instructions. Familiarize yourself with error codes and troubleshooting options displayed on the panel. Save your settings to ensure proper functionality.

Initial System Startup & Testing
Following configuration, initiate the system startup. Turn on the water supply slowly, checking for any leaks at the connections. Observe the humidifier pad as it begins to absorb water, ensuring even saturation. Monitor the control panel for proper operation and humidity readings.
Run the HVAC system in both heating and cooling modes to verify seamless integration. Check airflow across the evaporator pad. Confirm the drain line is functioning correctly, preventing water buildup. Adjust settings as needed to achieve desired humidity levels. Document initial readings for future reference.
Troubleshooting Common Installation Issues
Encountering problems? Let’s address typical installation hurdles. No power? Verify the electrical connection and breaker status. Water leaks? Inspect all water line connections and the drain line for tightness and proper seating. Insufficient humidity? Confirm the humidifier pad is correctly installed and saturated.
Check the control panel settings for accurate configuration. Ensure proper airflow across the pad. Review wiring diagrams for any discrepancies. Consult the FAQ section for quick solutions. If issues persist, contact Aprilaire support for expert assistance and further diagnostics.
No Power to the Unit
Experiencing a complete lack of power? Begin by verifying the power supply to the unit. Check the circuit breaker dedicated to the Aprilaire 500 – ensure it hasn’t tripped. Inspect the electrical wiring connections at the control board, confirming secure and correct placement according to the wiring diagram.
Use a voltage tester to confirm voltage is reaching the unit. Examine the transformer for any signs of damage. Review the power supply requirements (voltage and amperage) to ensure compatibility. If the problem persists, consult a qualified electrician to rule out electrical issues within your home’s system.
Water Leaks
Discovering water leaks requires immediate attention. First, inspect the water supply line connection to the humidifier, ensuring it’s tightly secured and the shut-off valve is fully closed if needed. Check the drain line for clogs or disconnections – a blocked drain can cause overflow.
Examine the humidifier pad housing for cracks or improper sealing. Verify the water panel is correctly installed and not damaged. Ensure the water supply pressure isn’t excessive. If leaks continue, disconnect the water supply and contact a qualified plumber or HVAC technician for assistance.
Aprilaire 500 Maintenance Schedule
Regular maintenance ensures peak performance and longevity; Monthly, visually inspect the unit for leaks or obstructions. Every three months, check and clean the drain line to prevent clogs and water damage. Semi-annually, inspect the water panel for mineral buildup and clean as needed.
Annually, replace the humidifier pad – a crucial step for optimal humidification. Before winter, verify all connections are secure and the system is functioning correctly. Follow these guidelines to maintain a healthy and efficient home environment with your Aprilaire 500.
Replacing the Humidifier Pad
Annual pad replacement is vital for optimal performance. First, shut off the water supply to the humidifier. Remove the old pad by carefully sliding it out of the humidifier housing – note its orientation for correct installation. Inspect the evaporator tray for mineral buildup and clean thoroughly.
Install the new pad, ensuring it’s properly seated and aligned. Restore the water supply and check for leaks. Allow the pad to fully saturate before resuming normal operation. A fresh pad guarantees efficient humidification and improved air quality throughout your home.
Winterization Procedures
Preparing your Aprilaire 500 for winter prevents damage from freezing temperatures. First, shut off the water supply to the humidifier. Drain the water panel and evaporator tray completely to eliminate any remaining water. Disconnect the water supply line and consider insulating it for added protection.
Set the humidifier to the “off” position on the control panel. Inspect the drain line to ensure it’s clear of obstructions. Proper winterization safeguards your investment and ensures a smooth restart when warmer weather returns, maintaining consistent indoor comfort.
Warranty Information
Aprilaire proudly stands behind the quality of the 500 humidifier. This unit is covered by a five-year limited warranty on all parts, protecting against manufacturing defects from the date of original purchase. Warranty coverage requires proper installation by a qualified technician and adherence to the provided installation manual guidelines.
The warranty does not cover damage resulting from misuse, improper maintenance, or acts of nature. To file a warranty claim, retain your proof of purchase and contact Aprilaire Customer Support. Full warranty details, including exclusions, are available at Aprilaire’s official website.
Frequently Asked Questions (FAQ)
Q: Can I install the Aprilaire 500 myself? A: While possible, professional installation is highly recommended to ensure proper function and maintain warranty validity.
Q: What water pressure is required? A: A minimum of 20 PSI and a maximum of 100 PSI is needed for optimal performance.
Q: How often should I replace the humidifier pad? A: Typically, every 1-3 years, depending on water quality and usage.
Q: What if I experience water leaks? A: Immediately shut off the water supply and consult the troubleshooting section or contact Aprilaire Support.
Contacting Aprilaire Support
For immediate assistance, visit the Aprilaire website at www.aprilaire.com and utilize their online support resources, including detailed FAQs and troubleshooting guides.
You can also reach their customer service team by phone at 1-800-334-6011, Monday through Friday, 8:00 AM to 5:00 PM Central Time.
For technical support specifically related to installation, please have your model number and date of purchase readily available.
Email inquiries can be submitted through the contact form on their website for non-urgent matters. Aprilaire is committed to providing excellent customer care.
Appendix: Detailed Wiring Diagrams & Specifications
This appendix contains crucial technical information for qualified installers. Included are comprehensive wiring diagrams illustrating various HVAC system configurations compatible with the Aprilaire 500.
Detailed schematics showcase connections for both standard and advanced control setups, ensuring correct electrical integration.
Furthermore, you’ll find precise product specifications, including voltage requirements (120V/24V), amperage draw, and physical dimensions.
Refer to these specifications when assessing compatibility and planning installation. Always prioritize safety and adhere to local electrical codes. Diagrams are subject to revision; check the Aprilaire website for the latest versions.