
Honeywell T4 Pro⁚ Overview
The Honeywell T4 Pro is a programmable thermostat designed for simple home climate management. Its installation manual, often in PDF format, guides users through a smooth setup. The device offers user-friendly operation.
Key Features of the Honeywell T4 Pro
The Honeywell T4 Pro boasts several key features that make it a popular choice for homeowners. This thermostat offers 7-day programmability, allowing for customized weekday and weekend schedules. It also incorporates adaptive intelligent recovery, learning how long your system takes to reach the desired temperature. This feature activates the system earlier, ensuring comfort sooner. The T4 Pro’s intuitive, on-screen menu simplifies the installation process, guiding users step-by-step. Its universal mounting system further facilitates a quick and easy setup. Additionally, the device provides maintenance reminders, helping users keep their systems running efficiently. The T4 Pro is designed for both ease of installation and user-friendly operation.
Installation Preparation
Before installing the Honeywell T4 Pro, it’s crucial to prepare properly. This includes gathering necessary tools and carefully reviewing the installation manual, particularly the safety guidelines.
Powering Off and Safety Precautions
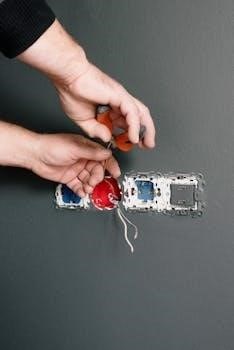
Prior to commencing any installation work on your Honeywell T4 Pro thermostat, it is absolutely essential to turn off the power at the breaker box or switch. This crucial step mitigates the risk of electrical shock, ensuring a safe working environment. Always verify that the power is indeed off before touching any wires. Carefully review the safety precautions outlined in the Honeywell T4 Pro installation manual PDF. These guidelines are provided to protect you and prevent any damage to the system during installation. Double-check all connections and follow the instructions to avoid any potential issues.
Mounting the Thermostat
The Honeywell T4 Pro utilizes a UWP mounting system. Correctly mounting the thermostat, as detailed in the installation manual PDF, ensures proper functionality and avoids damage.
Using the UWP Mounting System
The Universal Wall Plate (UWP) system is central to mounting the Honeywell T4 Pro. The installation manual PDF details the process of separating the UWP from the thermostat packaging. First, the UWP is positioned on the wall, ensuring it is level, and then screw hole positions are marked. After drilling, wall anchors may be lightly tapped in, and the UWP is then secured to the wall using supplied screws. The thermostat then attaches to the mounted UWP, completing the physical installation. Correctly following these steps is crucial to ensuring a secure and proper mounting.
Optional Cover Plate Installation
The Honeywell T4 Pro installation manual PDF outlines the steps for using the optional decorative cover plate. If the cover plate is desired, the junction box adapter is mounted to the wall or electrical box, using screws and anchors. The cover plate is then snapped onto the adapter. This option is beneficial to conceal any paint gaps or blemishes that may exist from a previous thermostat installation. The manual emphasizes proper alignment and secure attachment of the cover plate to ensure a clean and professional look. This enhances the aesthetic of the installed thermostat.
Wiring and Connections
The Honeywell T4 Pro installation manual details the wiring connections, including designations for terminals on the UWP. It provides guidance for wiring both conventional forced air and hydronic systems.
UWP Wiring Terminal Designations
The Honeywell T4 Pro’s Universal Wiring Platform (UWP) features clearly marked terminals for straightforward wiring. These designations are crucial for correct installation. Common terminals include R for power, Rc for cooling power, and W for heat. There’s also a G terminal for the fan, Y for the compressor, and C for the 24VAC common wire which is essential for many systems. Some models have terminals like AUX or W2 for auxiliary heat, Y2 for a second stage of cooling, and E for emergency heat, though these may not be used by the T4 Pro. The manual provides detailed descriptions and diagrams of these terminals.
Wiring Conventional Systems
Wiring the Honeywell T4 Pro for conventional systems, such as forced air and hydronic setups, requires careful attention. For a single transformer system, the R wire connects to either the R, Rc, or Rh terminal, depending on the existing wiring. In dual-transformer systems, separate R wires from the heating and cooling systems are used. The compressor contactor is wired to the Y terminal, and the heat relay to the W terminal. The fan relay connects to the G terminal, while the C terminal is for the 24VAC common wire; Diagrams in the installation manual are vital for proper connections.
Installer Setup (ISU)
The Installer Setup (ISU) menu on the Honeywell T4 Pro allows advanced configuration. Access it by pressing and holding the center and buttons to adjust system parameters. This menu is for installers.
Accessing and Navigating ISU Settings
To access the Installer Setup (ISU) on the Honeywell T4 Pro, you must simultaneously press and hold the CENTER button and the up arrow button for approximately three seconds. This action will open the advanced menu. Once in the advanced menu, use the ‘Select’ button to enter the ISU settings. Navigating through the various ISU options is achieved by repeatedly pressing the ‘Select’ button, cycling through each parameter. To adjust any parameter’s value, use the up and down arrow buttons to change the selection or value. This allows for precise customization of the thermostat’s operation. Remember to consult the installation manual for specific ISU parameters.
System Testing
The Honeywell T4 Pro includes a system test feature. This allows installers to verify heating, cooling, and fan operations. The test is accessed through the advanced menu for confirmation.
Performing a System Test
To initiate a system test on the Honeywell T4 Pro, begin by pressing and holding the CENTER and buttons simultaneously for approximately three seconds. This action will grant you entry to the advanced menu. Next, utilize the directional buttons to navigate to the “TEST” option. Once located, press the “Select” button to confirm and enter the system test mode. Within this mode, you can use the directional buttons to cycle through the available test options, which typically include Heat, Cool, Fan, and Em (Emergency Heat, if applicable). Select the desired test using the “Select” button, and the system will activate the selected function, allowing you to verify that it is operating correctly. This ensures that the wiring and thermostat are functioning correctly before regular use.

Troubleshooting
If you encounter issues with your Honeywell T4 Pro, consult the manual for common problems and solutions. Check power, wiring, and settings. Contact customer support if needed.
Common Issues and Solutions
Many common issues with the Honeywell T4 Pro can be resolved with simple troubleshooting steps. A blank display often indicates a power problem; check the circuit breaker or the system’s power switch. If the thermostat is not responding, ensure the wiring is correct and secure, referring to the wiring diagrams in the installation manual. If the system doesn’t turn on, verify the system settings in the Installer Setup (ISU) menu, and make sure that the thermostat is securely snapped onto the UWP mounting system. If the system is not heating or cooling properly, check the system test in the ISU. If problems persist, seeking assistance from Honeywell’s customer care is a viable solution.